What to check before buying a second-hand instrument
I share a concise, hands-on checklist for inspecting used gear so you buy confidence, not surprises. Before I visit a seller I research prices and common faults, pack a small test kit, and bring a short list of things to try. At the viewing I do a calm visual sweep, play to assess playability and tuning stability, test electronics and hardware, check for cracks or open seams, confirm maker and serials, and ask for service records. These practical steps work for guitars, violins, pianos, brass and woodwinds — and if you’re still deciding which to choose, a straightforward approach to choose your first instrument without regrets can save time and money.
Key takeaway
- Check the body for cracks, open seams, warping or repairs.
- Play it: tone, intonation, fret/key/bow response, and tuning stability.
- Test electronics: pickups, pots, switches, jacks and battery-powered preamps.
- Inspect hardware: tuners, bridge, tailpiece, pedals and screws.
- Verify maker, serial number and service history; set a firm walk-away price.
What I bring and how I prepare
I treat every tryout like a mini inspection. Pack a compact kit and a familiar test routine.
What I bring:
- Tuner (clip or app)
- Fresh batteries
- Phone (photos, recordings, serials)
- Small screwdriver / Allen wrench
- Headphones and/or amp cable (or a tiny battery amp)
- Polishing cloth
- A song or scale I know well
Before you go:
- Research typical prices and known faults for the model.
- Note a realistic target price and a walk-away price.
- Make a short checklist of visual checks and play tests to follow at the meet.
Step-by-step in-person test (quick routine)
See Museum guidance on inspecting instruments for handling and documenting condition.
- Visual & smell sweep: look for cracks, open seams, warped necks, loose binding; sniff for mustiness or smoke.
- Tune and play: tune up, play open strings, chords, single-note runs and a familiar song.
- Playability: check action, fret buzz, key/pad response or bow feel; test bends/vibrato.
- Intonation: check harmonic/12th-fret accuracy with a tuner.
- Electronics: plug in, test pickups/knobs/switches/jack; listen for crackle or dropout.
- Hardware: turn tuners, inspect bridge/saddles/tremolo, wiggle strap buttons and screws.
- Open panels: look inside control cavities, soundholes or instrument bodies with a light.
- Record serials and take photos of problem spots before negotiating.
Research first: prices and common faults
When asking “What to check before buying a second-hand instrument?” start online:
- Market sites: Reverb, eBay, Facebook Marketplace
- Local shop listings and used stores
- Forums, owner groups and YouTube demos
Look for:
- Typical price range for model and year
- Frequent faults (cracked headstocks, pot crackle, worn frets)
- Cost of replacement parts or common repairs
- Rarity of finish or edition (affects value)
If you’re unsure whether to buy or try something temporarily first, it’s worth weighing renting vs buying to limit risk. For newcomers comparing cost and options, a quick survey of affordable instruments and their market behavior helps set realistic expectations.
Red flag: a listing priced far below comparable recent sales—dig deeper.
How I assess playability (frets, keys, bow response, tuning stability)
Playability is how an instrument agrees with you.
Fretted instruments:
- Press and slide each fret to find buzz or dead spots.
- Check fret wear where strings hit most; heavy wear = refret soon.
- Assess action height and neck relief.
Woodwinds/brass:
- Tap each key, check pad seating and springs; cover tone holes and blow to test leaks.
- Inspect corks and solder joints.
Bowed instruments:
- Bow across every string at different speeds/pressures to hear even response.
- Listen for scratchy tone, dead spots, or uneven projection (possible bridge/soundpost issues).
Tuning stability (all instruments):
- Tune, play for 10–15 minutes, then recheck tuning.
- For electrics, bend strings and retune; for woodwinds, warm up and retest.
Quick test sequence:
- Tune.
- Play known passages.
- Stress-test (bends, trem, dynamics).
- Retune to check drift.
What to check for structural and hidden damage
Look and feel; then shine a light. See Conservation guide to instrument care for more on adhesives, delamination and environmental damage.
Visual checks:
- Hairline cracks, finish breaks, dents and repaired areas.
- Run your finger along seams—any roughness or movement can be an open seam.
- Sight down the neck for warping or twist.
Hidden checks:
- Tap the top/back—clear ring vs. dull thud (delamination/rot).
- Shine a flashlight into soundholes/F-holes to spot loose braces or glue lumps.
- Open electronics/control cavities: look for corrosion, loose wires, or burnt parts.
- For woodwinds/brass, inspect bores, pads, and solder joints.
Record everything: take full shots plus close-ups of neck joint, headstock, bridge and serials. Label photos with date and notes.
Tip: Ask the seller to remove covers or open cavities. If they refuse, treat it as a red flag.
Testing electronics and hardware
A fast practical routine saves surprises.
Electrics and electro-acoustics:
- Plug into an amp or headphone amp; test every pickup position.
- Tap pickups to confirm output; sweep volume/tone for crackle.
- Flip switches slowly; wiggle cable at the jack to detect intermittent connections.
- Replace/ask to test with a fresh battery for active preamps.
Hardware:
- Turn every tuner—smooth movement, no wobble.
- Inspect bridge, saddles, screws for rust, stripped threads or deep grooves.
- Test tremolo action (if present) for sticking or excessive play.
- Check nut slots for deep cuts and inspect screw heads for DIY repairs.
Carry a spare cable and screwdriver to isolate cable vs. instrument issues.
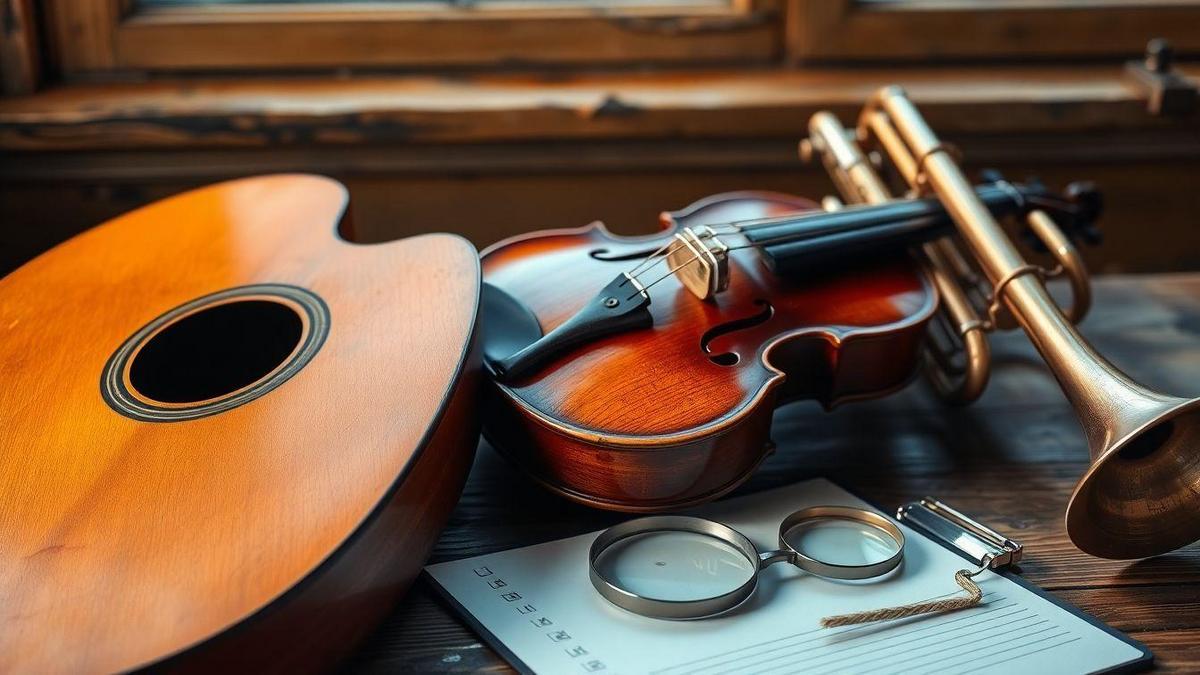
Instrument-specific essentials
Violins/viola/cello
- Sight for cracks, open seams, warped soundpost or tilted bridge.
- Look through f-holes for a straight soundpost; if loose or missing, tone suffers.
- Test pegs for smooth hold; check pads, fingerboard wear and bridge condition.
- Play open strings and first-position scales to find dead spots or rattles.
Deal-breakers: open seams, missing/loose soundpost, major top/back cracks.
Guitars (acoustic & electric)
- Body: top cracks, separated seams, big dents.
- Neck/fretboard: sight for straightness; press frets for buzz.
- Frets: flat spots indicate future refret.
- Electronics: plug in, tap pickups, test pots and switches.
- Hardware: tuners hold pitch, saddle height, and tremolo condition.
If you’re still choosing which family of instrument suits your style, a quick comparison of guitar, keyboard or drums can clarify priorities before you commit.
Pianos
- Play scales and trills across registers; listen for even tone.
- Check sticky or slow-returning keys and repetition in the upper register.
- Inspect soundboard for hairline vs. structural cracks; large open cracks are a major issue.
- Wiggle tuning pins; loose pins mean poor tuning stability.
- Look for rust, warped cabinet, mold or heavy smoke smell.
Piano red flags: large soundboard splits, loose pinblocks, severe hammer wear, signs of moisture damage.
For professional piano inspection and buying tips see Authoritative piano inspection and buying tips.
Verifying maker, age and authenticity
Think like a detective.
- Locate serial numbers (headstock, neck heel, inside body) and compare fonts/placement to known examples.
- Check construction details and period-correct parts; inconsistent hardware is suspect.
- Use manufacturer archives, auction records, and collector forums.
A museum catalog can help; see Museum resource on maker identification for examples of period construction and maker practices.
- For high-value pieces, get an expert appraisal.
Veteran tips and common oversights are easy to miss; the kind of hindsight in what I wish I had known often points to the small clues that reveal true condition.
Ask for provenance: original receipt, certificates, service invoices, old photos or auction listings.
Reviewing service history and spotting bad repairs
Good invoices and a reputable tech name add confidence.
Ask for:
- Invoices with dates, the shop/technician name, and parts used.
- Before/after photos of repairs.
- Warranty or guarantee details.
Watch for poor repairs:
- Rough refinish, sloppy glue, mismatched parts.
- Improper neck repairs, uneven or sharp fretwork.
- Messy soldering or non-OEM parts that harm tone/value.
Questions I always ask:
- What was fixed and when?
- Who did the work?
- Were original parts used?
- Do you have photos or invoices?
If answers are vague, be cautious.
Setting price, negotiating and resale sense
Treat the purchase like a small business: cost repairs resale value. If you need formal valuation guidance, consult Guidance on valuing musical instruments.
Steps I use:
- Search recent sold listings for the same make/model/condition. Record low/mid/high prices.
- Get a repair estimate for visible issues.
- Max buy price = mid sale price − repair cost − margin (desired profit or depreciation).
- Set a walk-away price ~10–20% below max buy to leave room to negotiate.
- Open with a fair lower offer (15–25% below asking) and use silence/time as leverage.
- Always get a receipt with seller contact, item details and serial number.
Example: If mid-market is $800 and repairs are $200, baseline becomes $600. Offer accordingly.
Conclusion
What to check before buying a second-hand instrument boils down to research, a small kit, a clear checklist, and calm inspection. Research price and common faults, do a visual sweep for cracks and open seams, play to test playability and tuning stability, plug in to check electronics, open cavities where possible, document serials and damage with photos, ask for service history, and set a firm walk-away price. If the seller dodges inspection or documentation, walk away.
Do the homework, take photos, and decide with dollars and sense. Follow these steps and you’ll avoid money pits and find instruments that truly sing for you. If you want a printable one-page checklist or instrument-specific printable checklists (guitar, violin, piano), I can prepare them next — and pair them with a simple practice routine to help you get playing right away.
Frequently asked questions
Q: What to check before buying a second-hand instrument?
A: Check the body for cracks and open seams, play every note to find dead spots or buzz, test electronics and hardware, verify maker/serials and service history, and set a clear walk-away price.
Q: How do I spot hidden damage?
A: Inspect seams and joints closely, tap the top/back for consistent ring, shine a flashlight into cavities, smell for mold or smoke, and open access panels to check for corrosion or sloppy repairs.
Q: How much should I pay for a used instrument?
A: Compare recent sold prices for the same model and condition, subtract repair/setup costs, and apply your desired margin. Set a maximum buy price before negotiating.
Q: Should I buy without paperwork?
A: You can, but lack of invoices or provenance increases risk. For higher-value items, insist on service records or a technician’s check.
If you want a printable one-page checklist or instrument-specific printable checklists (guitar, violin, piano), I can prepare them next.